Guide – Tutorial: Installing and Configuring APRSDroid
Guide – Tutorial for Installing and Configuring APRSDroid
APRSdroid is a full-featured Android app for transmitting and receiving APRS (Automatic Packet Reporting System) data. It uses the APRS system to share location and other information through data packets — very useful for navigation, route tracking and emergency situations.
Available from the Play Store and from its website
APRSdroid is available both on the Google Play Store and on its official website. There are, however, some important differences to keep in mind:
- Google Play Store: buying the app from Google’s official store guarantees that it is genuine, and you get automatic updates when they are available. That said, the Play Store version may lag slightly behind the updates that appear on the website.
- Official website: downloading it from the website gets you the latest version of the app, for free, since it is updated frequently before it reaches the store. Bear in mind, though, that you will need to enable the option to install apps from unknown sources on your Android device, which can be a small security risk if you are not careful.
APRSdroid is an outstanding project with a lot of effort and work behind it. If you like it and are going to get real use out of it, whatever installation method you choose, consider buying the app from the app store to support the developer financially. If you are here reading this, you have probably already realized that projects like this are not exactly common, and it never hurts to look after the people who make them possible by devoting their talent and time to them.
How to install APRSdroid from the Play Store
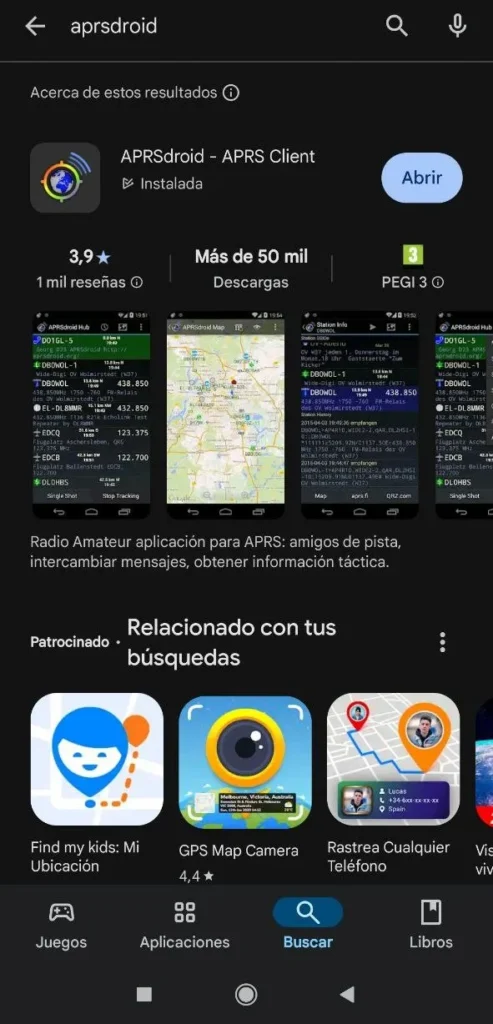
- Open the Google Play Store on your Android device.
- In the search field, type APRSdroid.
- Tap the APRSdroid app (developed by ge0rg).
- Tap Install and wait for it to download and install on your device.
- Once installed, open the app from your device’s app menu.
How to install APRSdroid from the official website
If you prefer to get the latest version of the app directly from its website, follow these steps:
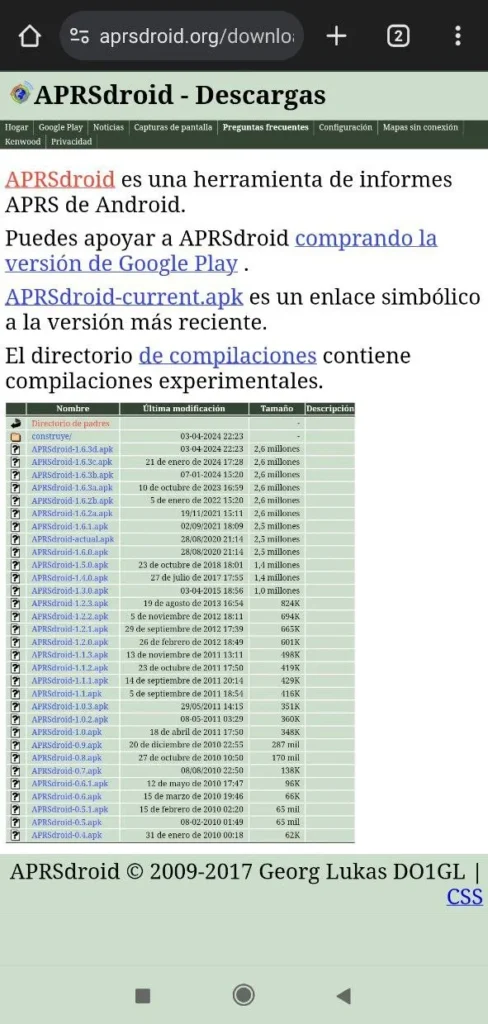
- Go to the official APRSdroid downloads page.
- Look for the most recent version in the list. It is probably the one at the very bottom of the list by default. Once you find it, download it.
- Make sure your device has the Install apps from unknown sources option enabled. You can enable it in Settings > Security > Unknown sources.
- Once the APK file has downloaded, open it to start the installation.
- Follow the on-screen instructions to finish the installation.
Connecting to APRS-IS servers
The first time you run the app, a warning window opens asking you to enter your callsign and your password.
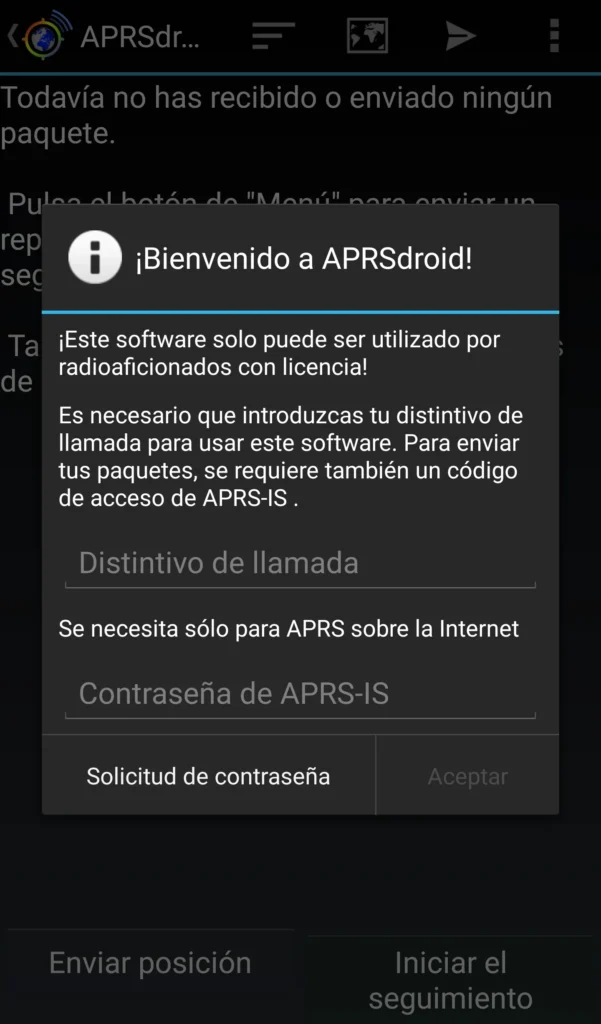
If you are reading this tutorial because you are a licensed amateur radio operator, you can skip this wall of text and jump to the next step further down.
If you do not have a license, things get more complicated. In the app’s settings I could not find any option to change the APRS-IS server or specify the frequency we are going to operate on. In the worst case, this could mean you receive a packet from your buddy Paco on CB and that packet gets repeated on the 2 m band. Since we have no control over the server our data is reported to, we cannot run any checks. In any case, the servers should be able to filter these packets so that they do not reach the wrong network.
To inform you, I took the risk on your behalf, my dear readers. I did something reckless. Now I sleep with one eye open in case the Mossad kicks my front door down one night to haul me and my old Super Jopix off to some secret hideout to be tortured for my sins.
Transmitting radio-frequency signals is regulated by the state in most countries, and we can only transmit on authorized frequencies — the amateur bands for licensed operators, or the freeband for anyone — but APRS is a different matter.
The history of APRS would be worth its own article. From the first APRS network to today’s APRS-IS network, a lot has happened. It is no longer just a network for amateur radio operators; it is used by many people interested in vehicle tracking, environmental monitoring, or simply people who lend their infrastructure as IGates for the network.
If you do not believe me, I invite you to check the terms of use of, for example, the aprs.fi network, or apps that can connect to these networks such as Dire Wolf, and look for any kind of usage restriction for users without an amateur radio license.
After running numerous tests with made-up callsigns on LoRa, PMR and 27 MHz, I have not found anything that makes me think I am doing something wrong in any respect. LoRa packets are only reported on the LoRa network, which in Spain corresponds to the 433 ISM frequency.
PMR packets are not reported by any device — they simply do not exist — but you can see your location on the map without any problem.
As for 27 MHz, there are a couple of projects with servers for APRS on CB. Unfortunately, on the days I ran the tests they were under maintenance and the network was down.
Once you know this, you have to make the big decision by asking yourself the big question: “Do I pull the sneaky move and register with a non-ham callsign, or uninstall the app and head back to the lobby?” The decision is yours, at your own risk. I do not want to influence you, and you know it.
Requesting a passcode
If you have an amateur radio license, or you are a daredevil who does not mind ending up on the Mossad’s most-wanted list, follow these steps to get your passcode.
To request the passcode, just type “APRS passcode” into any search engine, but since I know you like to get straight to the point, you can use this one.
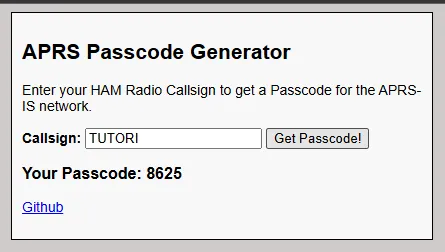
Just enter your callsign if you are a licensed operator, or the 6-character callsign you want to use, and then click “Get Passcode”. If you have trouble getting the passcode from your phone, try from a computer browser.
The number it gives you will always be the same for that callsign, and it is the password to use on the APRS-IS network.
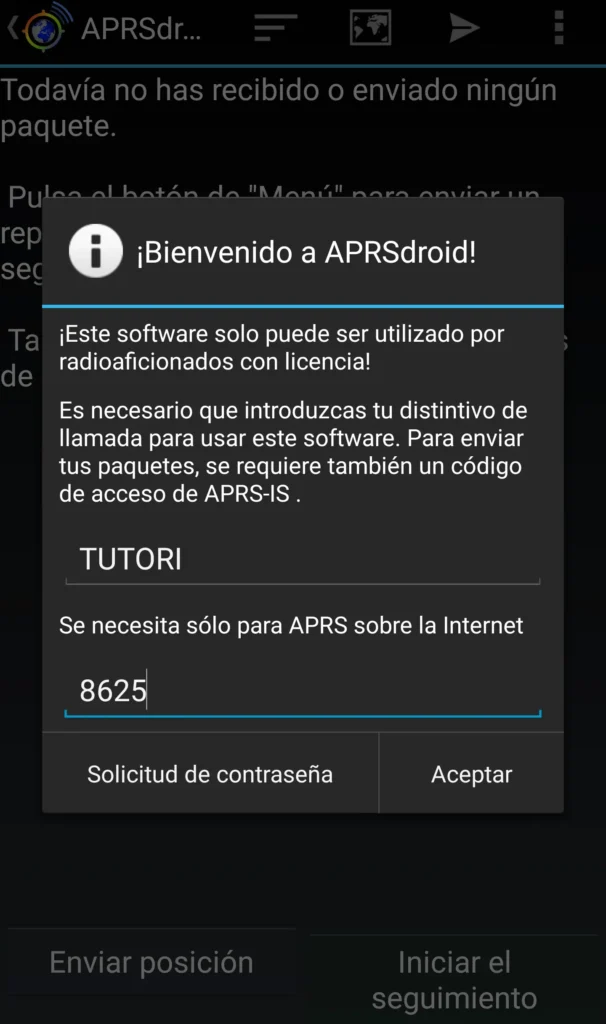
Configuring APRSdroid
Configuring APRSdroid is straightforward, but some fields are crucial for it to work properly. Here is how to set it up correctly so you can start using it right away:
- Open the app and go to the main screen.
- Open the settings by tapping the menu icon in the top right.
The settings fields that matter:
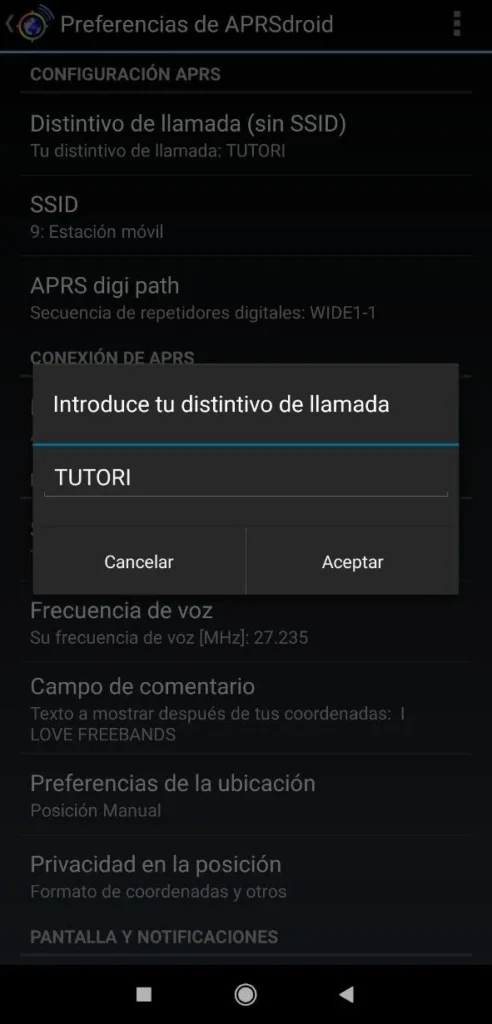
- Callsign: this field is your station’s identifier. Enter your operator callsign for free frequencies, or your amateur callsign for the ham bands (for example, ESRC01, 30RC01 or EA1XYZ). Always 6 characters.
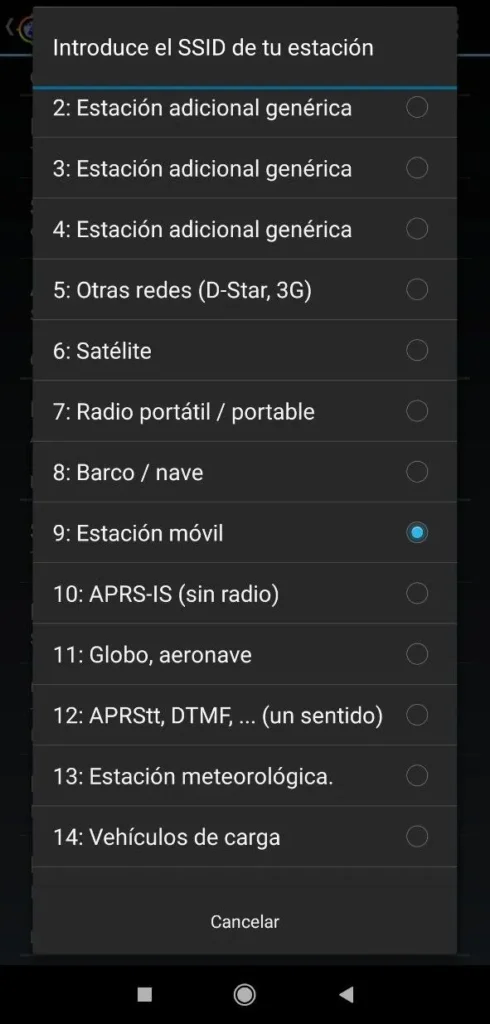
- SSID: in this field you select the type of station. I recommend choosing “Mobile station” or “Home station”.
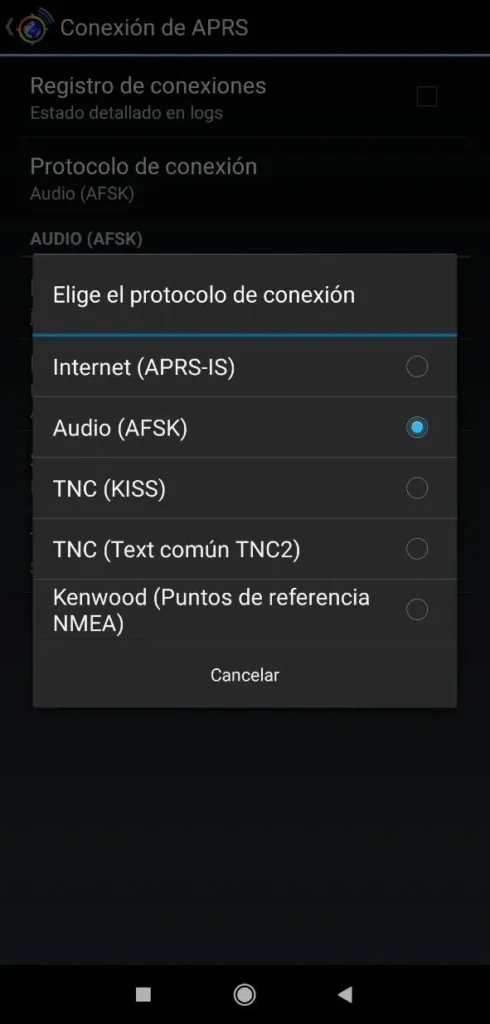
- Connection Preferences: this step is very important. Inside Connection Preferences you need to go into Connection Protocol. There are several options here. The one labeled Internet (APRS-IS) is the one that enables reporting to the APRS-IS network.
Since in my case I want to try to get the Mossad to stop looking for me, I select Audio (AFSK). That way my phone does not act as an IGate.
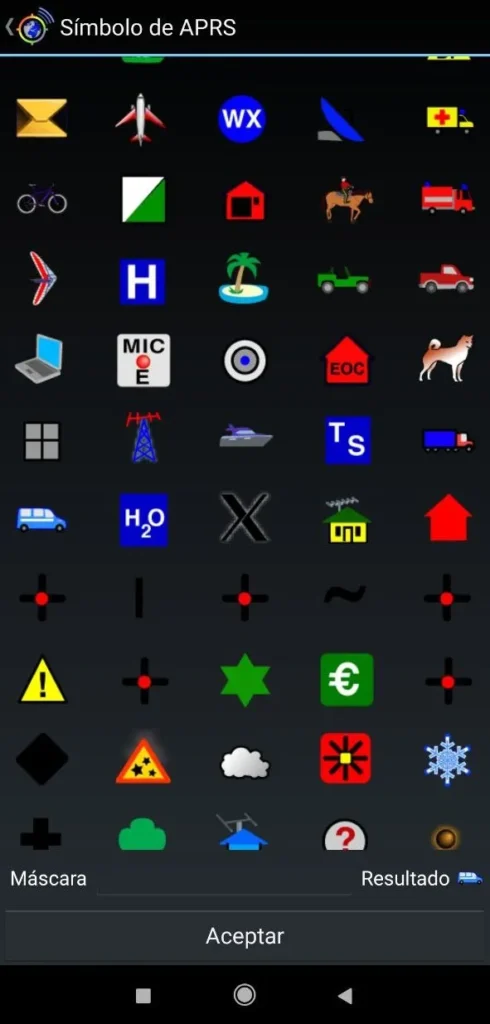
- APRS symbol: select the symbol you want to use to be shown on the maps. Try not to troll and use an appropriate one. In my case, since I use the app mainly for messaging, I pick the envelope (]).
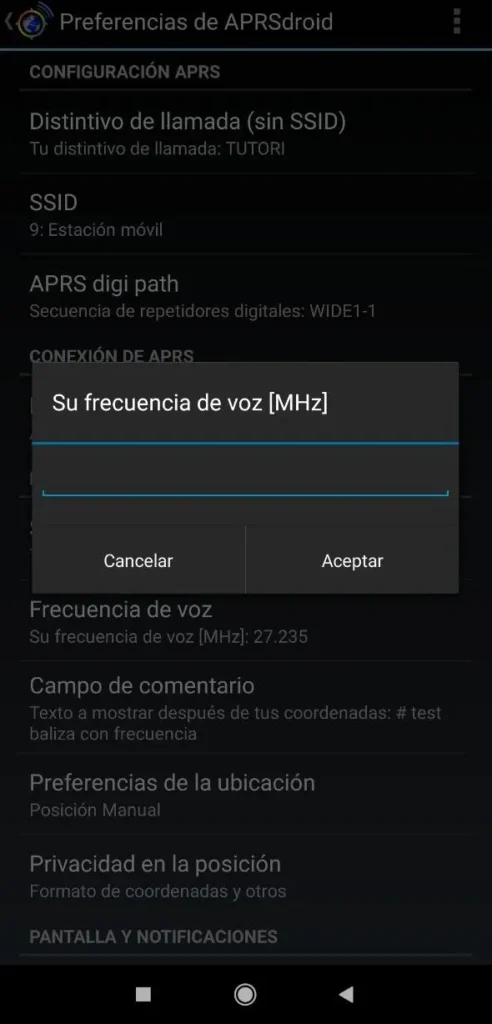
- Voice frequency: to use the app to send messages to the REM network, it is important that this field is empty. Otherwise the Telegram bot will not identify it correctly.
For other uses, you can set whatever frequency suits you.
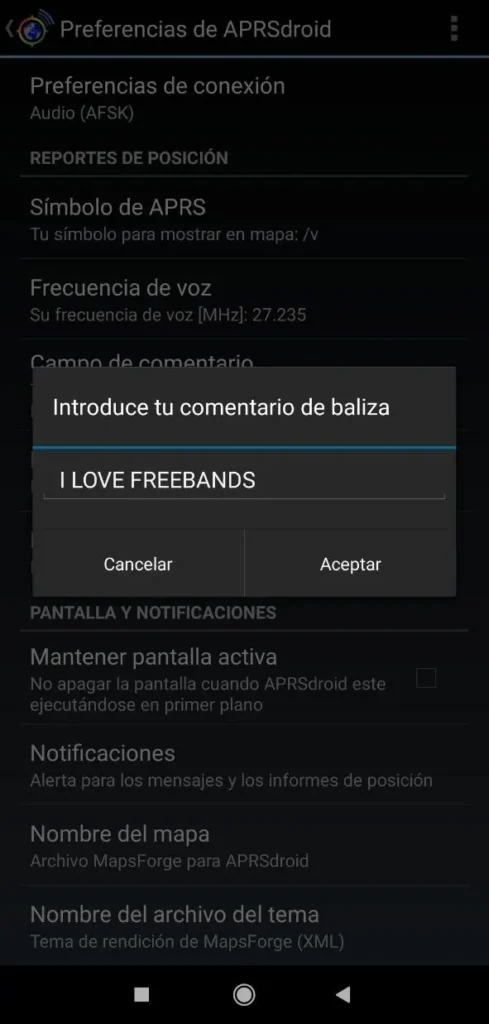
- Comment field: customize your beacon message here. Put whatever you think is relevant. Please avoid messages along the lines of “Fit 24yo seeks company in Madrid”. The right way to announce your antenna type and that you are keen to contact other operators would be “Full-wave vertical antenna – [email protected]”. Let us be serious.
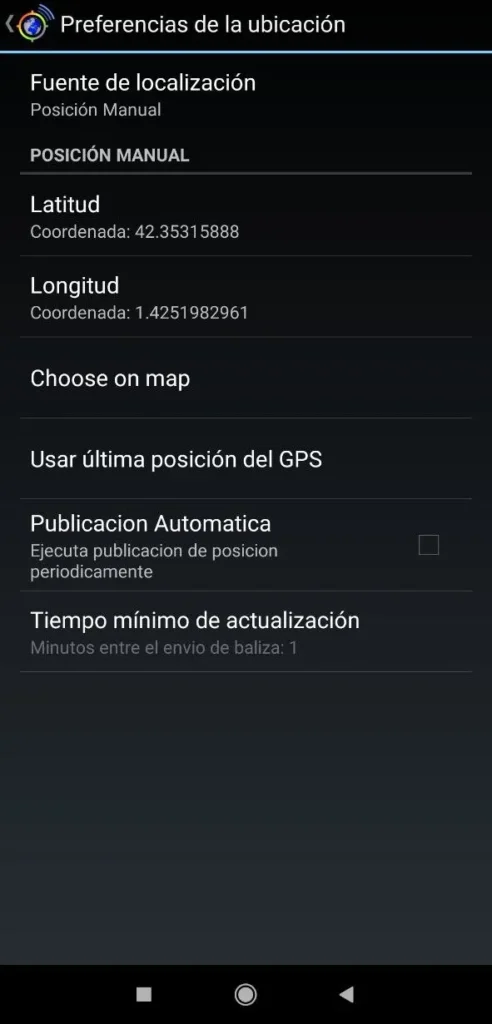
- Location preferences: here you will find another submenu. In it you can choose to take the location directly from your phone’s GPS, set a fixed location by entering the coordinates manually, or by picking a point on the map.
You can also turn the beacon on and off and set its interval.
If you are going to use the app indoors, I recommend setting the location to manual. Losing the GPS signal sometimes causes problems.
Testing APRSdroid
If you have followed the previous steps correctly, your APRSdroid app should be ready to use.
First of all, you need to be clear that APRS packets must be transmitted in FM. Generally, the signal needs to arrive reasonably cleanly to be decoded.
We can use this app with the trick of holding the phone’s speaker up to the radio’s microphone or the walkie-talkie’s microphone. It will work, but the quality will not be the same as using an audio interface.
There are various types of commercial interfaces for sale, and there is also plenty of documentation online if you would rather build your own. All the interfaces I have were custom-built for my radios by EA5PR. If you would like him to build you one and ship it to your home, you can contact him directly through the WhatsApp number on his tinkering page.
Before you can use the app at all, you first have to Start Tracking. With tracking turned off, even the messaging part does not work.
Three simple tabs to control everything

With everything running, you can navigate three screens, or menus.
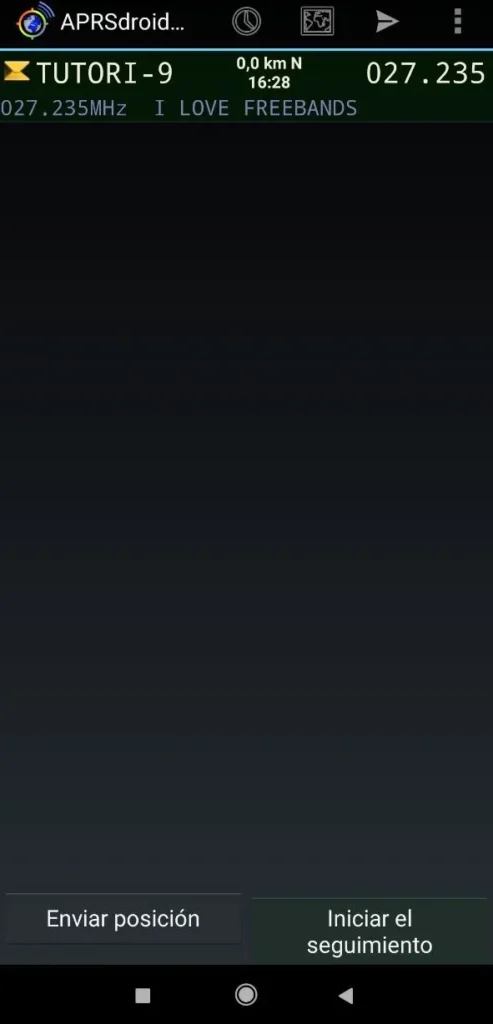
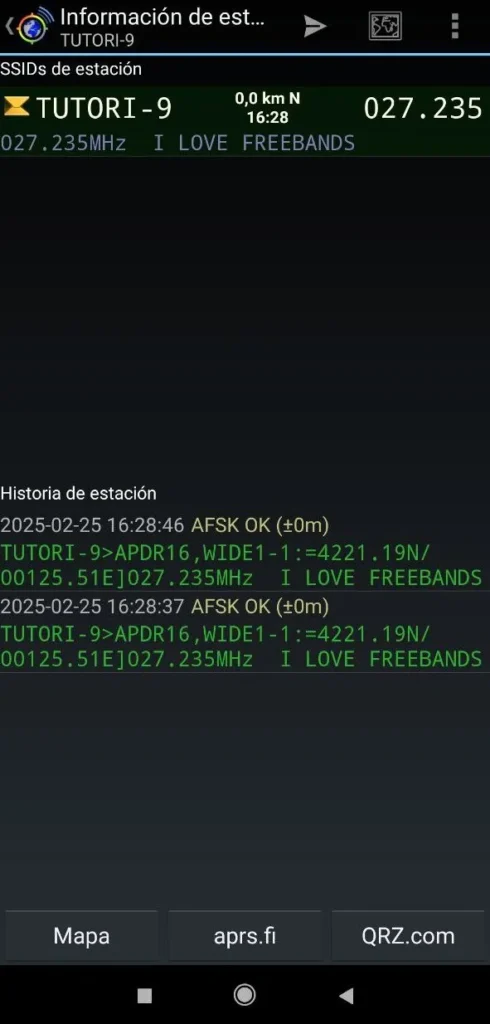
- Main screen: on this screen you can see the stations you have received packets from. Including your own.
Tapping on them expands the information and shows all the packets.
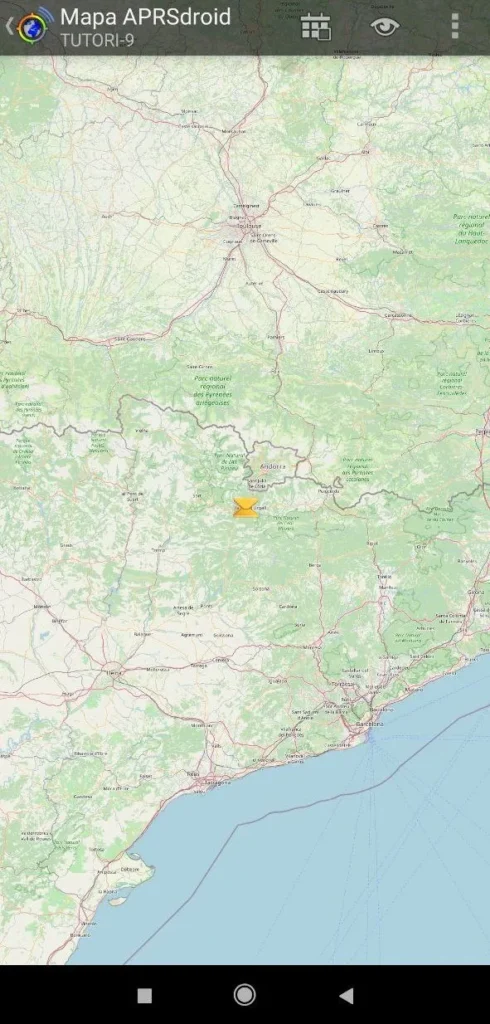
- MAP: on this tab you can see, on a map, the location of the stations received. Including your own.
- Messages: this is the tab that lets you send custom messages quickly and easily.
Once the messages have been sent, you can see them and confirm they went out correctly from the main tab, where the packets are shown.
The APRS adventure awaits you
Whether you are diving into the world of amateur radio or simply exploring new technology, APRSdroid opens the door to a universe of possibilities. From sharing your location to connecting with a global network of enthusiasts, this is just the start of a fascinating journey. It does not matter whether you are an expert or a beginner — what matters is taking the first step and daring to experiment. So grab your gear, set up the app and join the community. Radio frequency is your tool, and the world is waiting for your signal!